General Contracting
  • neilghuman

Do You Need a General Contractor for Your Remodel?

The short answer: if you’re remodeling a commercial space, yes—and here’s why it matters.

Commercial remodels are a different animal than residential projects. There are more stakeholders, stricter code requirements, tighter timelines, and real financial consequences when things go sideways. The question isn’t really whether you need a general contractor—it’s what happens when you try to manage the process without one.


What a General Contractor Actually Does

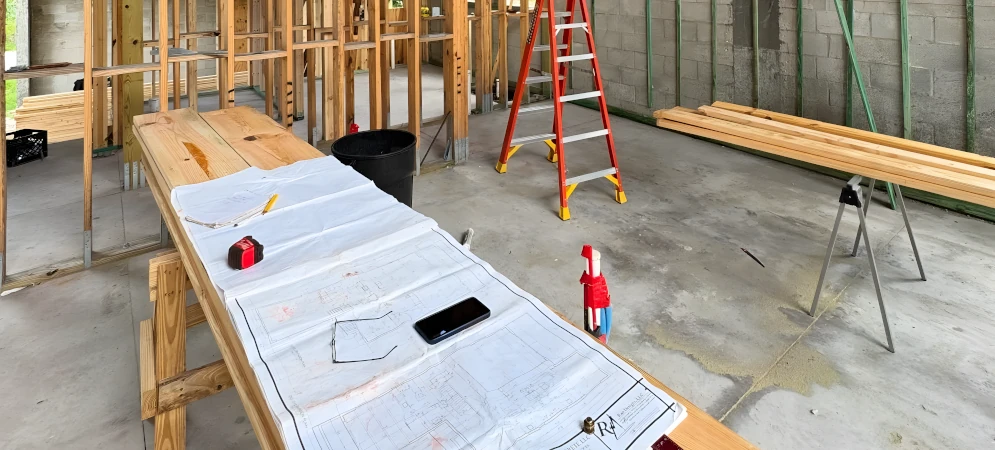
A GC isn’t just someone who swings a hammer. On a commercial remodel, a general contractor is the person responsible for holding the entire project together—coordinating every trade, managing the schedule, pulling permits, passing inspections, and making sure the work meets code and lease requirements. Without that single point of accountability, the burden falls on you.

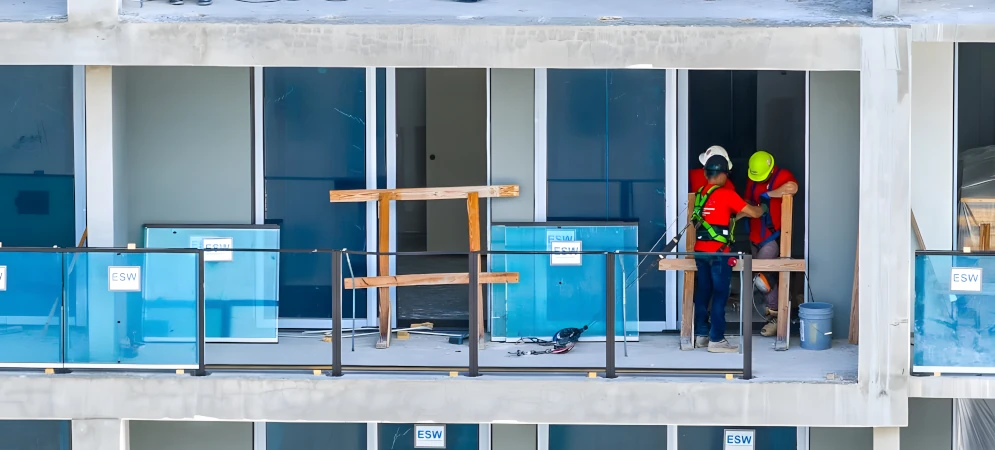
Most business owners and property managers are already running full schedules. Adding daily coordination of electricians, plumbers, framers, tile setters, and inspectors on top of that isn’t just inconvenient—it’s a recipe for delays, miscommunication, and cost overruns that could have been avoided entirely.


The Real Cost of Going Without One

It’s tempting to think that managing trades directly will save money. In some cases it might—but in commercial construction, the risk rarely justifies the savings. A missed inspection means rescheduling and delays. A trade that shows up out of sequence means rework. A permit pulled incorrectly means stop-work orders. These aren’t hypothetical scenarios—they’re the most common reasons commercial remodels run over budget and over schedule.

A general contractor prices projects to include their management, coordination, and oversight—and that cost is almost always offset by the efficiency, accountability, and problem-solving they bring to the job. What you save in GC fees, you often spend twice over in delays and corrections.


When the Scope Demands It

Not every commercial project requires a full general contractor engagement. Minor cosmetic updates—fresh paint, carpet replacement, basic fixture swaps—can sometimes be handled with a single trade or a handyman. But the moment your remodel involves structural changes, mechanical or electrical work, permit requirements, or multiple trades working in sequence, a general contractor isn’t optional—it’s essential.

If your project includes any of the following, you need a GC:

  • Load-bearing wall removal or structural modifications
  • Plumbing or electrical upgrades requiring permits and inspections
  • HVAC modifications or new system installation
  • Work that must comply with ADA, fire code, or lease build-out requirements

What to Look for When Hiring One

Not all general contractors are built the same. For commercial work, you want someone with direct experience in the type of space you’re remodeling—whether that’s office, retail, medical, or industrial. Verify licensing, bonding, and insurance before any conversation about price. Ask how they handle permitting, who your point of contact will be, and how they communicate progress throughout the project.

The right GC will ask just as many questions as you do. They’ll want to understand your timeline, your lease obligations, whether the space will be occupied during construction, and what success looks like when the project is complete. If a contractor shows up, throws out a number, and asks when they can start—keep looking.


The Bottom Line

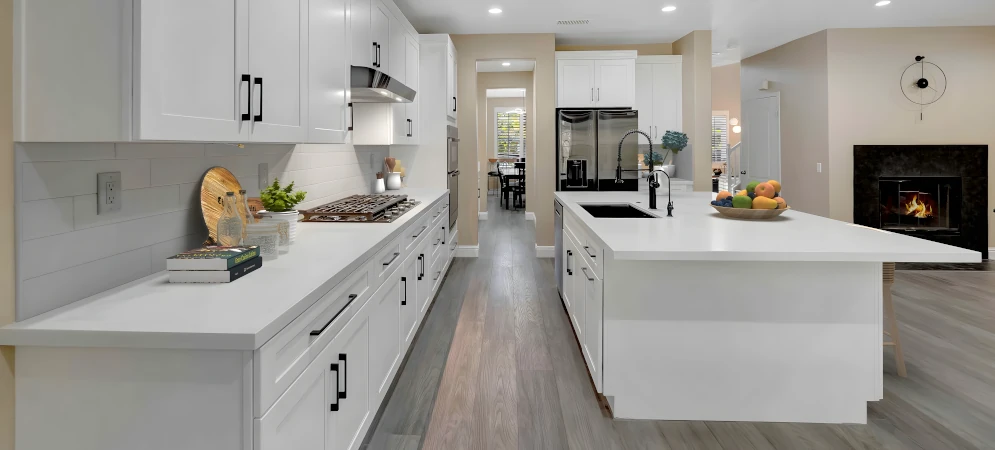
A commercial remodel is an investment in your business, your tenants, or your property. Protecting that investment means putting the right team in place from the start. A qualified general contractor brings structure, accountability, and expertise that keeps your project on track, on budget, and built to code—so when the work is done, you can focus on what you actually came there to do.

General Contracting
  • neilghuman

Commercial Renovation Checklist for Property Managers

Before the first contractor sets foot on your property, the groundwork you lay will determine how smoothly everything that follows goes.

Managing a commercial renovation is a significant undertaking—and property managers are often pulled in multiple directions at once. Tenants to communicate with, lease obligations to honor, budgets to protect, and timelines to enforce. Having a clear checklist before work begins isn’t just helpful—it’s the difference between a project that runs smoothly and one that becomes a liability.


Before You Start

The pre-construction phase is where most renovation problems are either prevented or created. Taking time to work through the right questions upfront saves significant time, money, and stress once work is underway.

  • Confirm lease terms and tenant improvement allowances with your legal team
  • Identify whether the scope requires permits and which jurisdiction governs the property
  • Establish a realistic budget with a contingency of at least 10–15% for unforeseen conditions
  • Define the project scope in writing before soliciting contractor bids
  • Verify that all contractors are licensed, bonded, and insured before engagement
  • Confirm whether the space will be occupied during construction and plan accordingly

Hiring the Right Contractor

Selecting the right general contractor is the single most important decision in the renovation process. Price matters, but it shouldn’t be the only filter.

  • Request itemized bids—not lump sum estimates—so scope is clearly defined
  • Ask for references from similar commercial projects in your market
  • Confirm the contractor has experience with your property type—office, retail, medical, or industrial
  • Clarify who your point of contact will be and how communication will be handled
  • Ensure the contract includes a clear scope, timeline, payment schedule, and change order process

During Construction

Active oversight during construction keeps projects on track and prevents small issues from becoming costly ones.

  • Schedule regular site walkthroughs with your project manager
  • Document progress with photos at each major phase
  • Review and approve all change orders in writing before additional work proceeds
  • Confirm inspections are being scheduled and passed at each required phase
  • Communicate proactively with tenants or occupants about noise, access, and timeline

Approaching Closeout

The final phase is where details get missed if there isn’t a disciplined process in place to catch them.

  • Complete a thorough punch list walkthrough before signing off on the project
  • Confirm all permits have received final sign-off and documentation is on file
  • Obtain all warranties, manuals, and maintenance documentation for installed systems
  • Verify the space is clean, undamaged, and ready for occupancy before releasing final payment
  • Conduct a post-project review to capture lessons learned for future renovations

A Well-Managed Renovation Protects Your Asset and Your Tenants

Commercial renovations don’t have to be chaotic. With the right preparation, the right contractor, and a clear process from start to finish, a renovation can be completed on time, within budget, and with minimal disruption to the people who depend on the property every day. Use this checklist as a starting point—and don’t hesitate to lean on your general contractor to help you work through it. The best ones will welcome the structure.

Permitting
  • neilghuman

Step-by-Step Guide to Getting a Construction Permit in Seattle

Navigating Seattle’s permitting process doesn’t have to be overwhelming—but going in without a plan will cost you time and money.

Whether you’re remodeling a commercial space, adding square footage to a home, or making structural changes to an existing building, chances are you need a permit. Seattle’s Department of Construction and Inspections (SDCI) oversees the permitting process, and while the system has become more streamlined in recent years, it still requires careful preparation, accurate documentation, and patience. Here’s what the process looks like from start to finish.


Step 1: Determine Whether You Need a Permit

Not every construction project requires a permit, but most do. Minor cosmetic work—painting, flooring, cabinet replacement—typically doesn’t. The moment you touch structural elements, electrical systems, plumbing, or mechanical work, a permit is almost always required. When in doubt, check with SDCI directly or consult your contractor before assuming you’re in the clear.


Step 2: Identify the Right Permit Type

Seattle issues several types of permits depending on the scope of work. The most common include:

  • Construction permits for new builds, additions, and significant alterations
  • Mechanical permits for HVAC, ventilation, and fuel gas systems
  • Electrical permits issued through the Washington State Department of Labor & Industries
  • Demolition permits for full or partial structure removal
  • Side sewer permits for work involving sewer connections or repairs

Identifying the correct permit type upfront prevents delays caused by submitting the wrong application or missing a required secondary permit.


Step 3: Prepare Your Submittal Package

This is where most applicants slow down. A complete submittal package typically includes site plans, floor plans, elevation drawings, structural calculations, and project descriptions that meet SDCI’s formatting and content requirements. For larger or more complex projects, stamped drawings from a licensed architect or structural engineer are required.

Incomplete submittals are one of the most common causes of permitting delays. SDCI will return incomplete applications with a correction notice—and every round of corrections adds weeks to your timeline. Getting it right the first time matters.


Step 4: Submit Your Application

Seattle accepts permit applications through its online portal, Seattle Services Portal. For over-the-counter permits—smaller, straightforward scopes—same-day or next-day approval is sometimes possible. For projects requiring plan review, expect a longer timeline depending on project complexity and current SDCI workload.

At the time of submission you’ll pay an initial permit fee. Additional fees may be assessed once the application is reviewed and the full scope is evaluated.


Step 5: Navigate the Plan Review Process

Once submitted, your application enters plan review. A plans examiner will review your documents for compliance with Seattle’s building code, zoning regulations, and any applicable overlay districts. If corrections are required, you’ll receive a comment letter outlining what needs to be addressed before approval can move forward.

Responding to correction comments quickly and completely is critical. Projects that sit in correction status without a response stall indefinitely—and in a busy permitting environment, every week of delay matters.


Step 6: Permit Issuance and Construction

Once your plans are approved, your permit is issued and construction can begin. The issued permit and approved plans must be kept on site at all times during construction. Work must match what was approved—any changes to scope mid-project may require a plan revision or an addendum permit before proceeding.


Step 7: Schedule and Pass Required Inspections

Inspections are required at specific phases of construction—not just at the end. Common inspection points include:

  • Foundation and footing before concrete is poured
  • Framing before walls are closed
  • Rough mechanical, electrical, and plumbing before insulation
  • Insulation before drywall
  • Final inspection upon project completion

Inspections are scheduled through SDCI’s online portal or by phone. Missing a required inspection—or closing up walls before an inspector signs off—can result in costly rework and stop-work orders.


Step 8: Final Sign-Off and Permit Closeout

Once all inspections are passed, your permit is finaled and the project is officially closed out. For commercial projects, this documentation is important to retain—it confirms the work was done legally and to code, which matters at the time of sale, refinancing, or lease renewal.


Let Your Contractor Handle It

The permitting process is manageable—but it’s time-consuming, detail-driven, and unforgiving of mistakes. At Washington Construction, we manage the entire permit process on behalf of our clients—from identifying the right permit type and preparing accurate submittals to responding to correction comments and scheduling every required inspection. You focus on your project. We’ll handle the paperwork.

Kitchen Remodel
  • neilghuman

Top 5 Kitchen Remodeling Trends in Washington for 2026

Homeowners across the Pacific Northwest are rethinking their kitchens—and the results are smarter, more personal, and built to last.

Washington homeowners have always had a distinct design sensibility—drawn to natural materials, clean lines, and spaces that feel connected to the environment outside. In 2026, that sensibility is showing up in kitchens more than ever, blended with a growing demand for functionality, storage, and technology that keeps up with how people actually live. Here are the five trends we’re seeing most in the kitchens we’re building right now.


1. Warm, Natural Materials Are Replacing Cold and Stark

The all-white kitchen with stark white quartz and chrome fixtures has had a long run—but it’s giving way to something warmer. Homeowners are gravitating toward natural wood tones, leathered or honed stone finishes, unlacquered brass hardware, and earthy color palettes that feel grounded and inviting. Walnut cabinetry, warm white oak open shelving, and terracotta or sage accents are showing up consistently in remodels across the Seattle area.

This shift isn’t just aesthetic—it’s a reaction to years of cold, clinical kitchens that photographed well but didn’t feel like home. The 2026 kitchen is designed to be lived in, and the materials reflect that.


2. Functional Storage Over Decorative Open Shelving

Open shelving had its moment, and for the right homeowner it still works beautifully. But the trend in 2026 is leaning hard toward intentional, built-in storage solutions that keep countertops clear and everything within reach. Appliance garages, deep drawer systems, pull-out pantry cabinets, and custom inserts are replacing the decorative shelf walls that require constant styling to look presentable.

Washington homeowners—practical by nature—are prioritizing kitchens that work as hard as they look good. That means more cabinet volume, smarter interior organization, and storage solutions designed around how each household actually cooks and shops.


3. The Island Is Doing More Than Ever

The kitchen island has evolved well beyond extra counter space. In 2026, islands are being designed as multi-functional anchors—combining prep space, seating, storage, secondary sink placement, and integrated appliances like wine fridges or microwave drawers into a single, intentional piece. Waterfall edges in contrasting materials, statement lighting overhead, and mixed base finishes are making islands as much a design focal point as a functional one.

For open concept layouts, the island is also doing structural and visual work—acting as the natural boundary between the kitchen and living areas without the need for a wall. When designed well, it defines the space without dividing it.


4. Smarter Kitchens Without the Gadget Overload

Technology is finding its way into kitchens in 2026—but the most popular integrations are subtle and practical rather than flashy. Touchless faucets, under-cabinet LED lighting on dimmer systems, built-in charging stations, and induction cooktops are among the most requested upgrades we’re seeing. Smart hood ventilation that adjusts automatically and refrigerators with interior cameras are becoming more common in higher-end remodels.

What homeowners in Washington are not doing is filling their kitchens with tech for the sake of it. The preference here is for technology that solves a real problem, integrates cleanly into the design, and doesn’t require a manual to operate on a Tuesday morning.


5. Sustainability and Local Materials Are a Real Priority

Pacific Northwest homeowners have always cared about sustainability—but in 2026 it’s moving from a nice-to-have to a genuine design driver. Reclaimed wood accents, locally sourced stone, low-VOC cabinetry finishes, and energy-efficient appliances are showing up on more project briefs than ever. Homeowners are asking where materials come from, how they’re made, and how long they’ll last—because a kitchen built to last 30 years is inherently more sustainable than one that needs replacing in 10.

This aligns naturally with the broader shift toward durability and quality over trend-chasing. The most thoughtful kitchen remodels we’re building today are designed to age gracefully—materials that develop character over time rather than looking dated in five years.


Building the Kitchen You Actually Want

Trends are a useful starting point, but the best kitchen remodel is the one that fits how you live—not just what’s popular right now. At Washington Construction, we work with homeowners across the Seattle area to design and build kitchens that are beautiful, functional, and built to last. Whether you’re drawn to warm and organic or clean and contemporary, we bring the same level of craftsmanship and project management to every build—keeping your project on schedule and your vision on track from the first conversation to the final walkthrough.


Exterior Renovation
  • neilghuman

What Is Included in a Full Exterior Renovation?

Your home’s exterior is the first thing people see—and the first line of defense against the Pacific Northwest’s relentless weather.

A full exterior renovation is one of the most impactful investments a homeowner can make. It improves curb appeal, protects the structure from moisture and decay, increases property value, and in many cases addresses deferred maintenance that—left unchecked—leads to far more costly repairs down the road. But what exactly does a full exterior renovation include? The answer depends on the condition of your home and your goals, but here’s a comprehensive look at what the scope typically covers.


Siding Replacement or Repair

Siding is the most visible component of any exterior renovation and often the one in the most need of attention. In the Pacific Northwest, years of rain and moisture take a significant toll on wood siding, fiber cement, and older materials that weren’t designed for this climate. A full exterior renovation typically includes a thorough assessment of existing siding—identifying rot, damage, and failing sections—followed by repair or full replacement depending on what the inspection reveals.

Material selection matters here. Fiber cement siding has become the preferred choice for Washington homeowners due to its durability, moisture resistance, and low maintenance requirements. Engineered wood offers a more natural appearance with improved performance over traditional wood. Each option comes with different cost profiles, maintenance expectations, and aesthetic outcomes—and we walk every homeowner through the tradeoffs before any material is selected.


Roofing Assessment and Replacement

A full exterior renovation without addressing the roof is an incomplete project. The roof is the primary barrier between your home and the elements, and in Seattle’s climate it works harder than almost anywhere else. If the existing roof is aging, showing signs of wear, or nearing the end of its service life, a full renovation is the right time to address it—before new siding and trim go on around a roof that will need replacing in two years anyway.

Roofing work in a full exterior renovation typically includes a full inspection, removal of existing material, assessment of the decking beneath, and installation of new roofing with proper underlayment and flashing. Gutters and downspouts are evaluated and replaced as part of this phase to ensure water is being managed correctly from the roofline to the ground.


Windows and Doors

Windows and exterior doors are both functional and aesthetic components of a full renovation. Older windows that are drafty, fogged between panes, or difficult to operate are not just an inconvenience—they’re an energy efficiency problem and a moisture risk. Replacing windows as part of a full exterior renovation ensures the envelope of the home is tight, efficient, and properly flashed and sealed against water intrusion.

Exterior doors—front entry, side entry, and garage doors—are evaluated for condition, security, insulation value, and appearance. A new front door in particular has an outsized impact on curb appeal and can anchor the overall design direction of the renovation.


Trim, Fascia, and Soffit

These are the details that separate a renovation that looks finished from one that looks patched. Trim around windows and doors, fascia boards along the roofline, and soffit panels beneath the eaves are all vulnerable to moisture damage and rot—and they’re often the first areas to show deterioration. In a full exterior renovation, these components are inspected, repaired, or replaced and finished to match or complement the new siding and overall design.

Getting trim details right requires precision and an eye for proportion. Poorly installed or mismatched trim undermines an otherwise quality renovation—so we treat these elements with the same attention as any other phase of the project.


Paint and Exterior Finishes

Whether new siding is being installed or existing surfaces are being refreshed, paint and exterior finishes are the final layer of protection and the element that ties the entire renovation together visually. Exterior paint in the Pacific Northwest needs to be selected for moisture resistance, UV stability, and longevity—not just color. Proper surface preparation, priming, and application technique determine how long the finish holds up far more than the paint brand alone.

Color selection is a meaningful decision that affects how the home relates to its surroundings, its architectural style, and the neighborhood context. We work with homeowners to choose palettes that feel intentional and age well.


Decks, Porches, and Exterior Structures

A full exterior renovation often extends to attached structures—decks, covered porches, pergolas, and entryway overhangs. These elements are evaluated for structural integrity, surface condition, and weatherproofing. Decking that is rotting, soft, or structurally compromised is replaced. Railings are checked for code compliance and safety. Covered structures are assessed for drainage and ventilation to prevent the moisture buildup that shortens their lifespan.


Hardscape and Site Transitions

The area immediately around the home—walkways, steps, retaining walls, and grading—plays a role in how water behaves around the foundation. A full exterior renovation takes a holistic view of the property, addressing drainage issues, re-grading where needed, and replacing or repairing hardscape elements that direct water toward the structure rather than away from it.


What a Full Exterior Renovation Delivers

A well-executed exterior renovation does more than make a home look new—it protects the structure, improves energy efficiency, and adds measurable value to the property. At Washington Construction, we approach every exterior project with a detailed assessment, a clear scope, and a coordinated execution plan that keeps the project moving efficiently. From siding and roofing to trim details and site drainage, we manage every component under one roof so nothing falls through the cracks—and the finished product reflects the investment you’ve made in your home.

Exterior Improvements
  • neilghuman

Choosing the Right Materials for Your Deck or Outdoor Project

The material you choose for your deck or outdoor project will determine how it looks, how long it lasts, and how much time and money you spend maintaining it.

Outdoor projects are a significant investment—and in the Pacific Northwest, they’re put to the test every single year. Rain, moisture, UV exposure, and temperature swings separate quality materials from ones that look great on day one and deteriorate within a few seasons. Before you commit to a direction, it’s worth understanding what your options actually are, what each one demands of you as a homeowner, and which one makes the most sense for your project, your lifestyle, and your budget.


Pressure-Treated Lumber

Pressure-treated lumber is the most common and most affordable decking material on the market. It’s widely available, easy to work with, and when properly maintained, can last 15 to 20 years. The tradeoff is that it requires consistent upkeep—sealing or staining every one to two years to prevent moisture absorption, cracking, and graying. In Seattle’s climate, a pressure-treated deck that isn’t maintained will show its age quickly.

It’s worth noting that pressure-treated lumber is almost always the right choice for the subframe beneath your deck—regardless of what surface material you choose. Its resistance to ground contact, moisture, and insects makes it the standard for structural framing, even on composite or hardwood deck builds.


Cedar and Redwood

Cedar and redwood are the premium end of natural wood decking. Both species contain natural oils that provide inherent resistance to moisture, insects, and decay—making them better suited for wet climates than pressure-treated pine. They’re also beautiful, with warm tones and natural grain patterns that are difficult to replicate with engineered materials.

The catch is cost and maintenance. Cedar and redwood are significantly more expensive than pressure-treated lumber, and they still require regular sealing and staining to preserve their appearance and longevity. Left unfinished in a wet climate, even cedar will gray, crack, and deteriorate over time. For homeowners who love the look of natural wood and are committed to maintaining it, cedar or redwood is a worthy investment. For those who want low maintenance above all else, there are better options.


Composite Decking

Composite decking has become the most popular choice for Pacific Northwest homeowners—and for good reason. Engineered from a blend of wood fibers and recycled plastics, composite boards resist moisture, fading, staining, and insect damage without the ongoing maintenance that natural wood demands. There’s no sealing, no staining, and no annual treatment—an occasional rinse is typically all it takes to keep a composite deck looking sharp.

Quality composite decking carries lifespans of 25 to 30 years, and most leading manufacturers back their products with long-term warranties. The upfront cost is higher than wood, but when you factor in the elimination of ongoing maintenance costs and the extended lifespan, composite frequently comes out ahead over the life of the deck. For a climate like Seattle’s, it’s hard to make a case against it.


PVC Decking

PVC decking takes the moisture resistance of composite a step further. Made entirely from cellular PVC with no wood content, it is completely impervious to moisture, rot, and insects. It won’t absorb water under any circumstances, making it particularly well-suited for covered decks, rooftop applications, or any structure where standing water is a concern.

PVC is among the most expensive decking options available, and some homeowners find it feels less natural underfoot than composite or wood. However, for the right application—particularly where moisture exposure is extreme—it offers performance that nothing else can match.


Hardwood Decking

Exotic hardwoods like Ipe, Tigerwood, and Cumaru are among the most durable and visually striking decking materials available. Naturally dense and resistant to moisture, insects, and fire, quality hardwood decks can last 40 years or more when properly maintained. The finished look is exceptional—rich, deep tones and tight grain patterns that age beautifully.

The tradeoffs are significant. Hardwood decking is expensive, difficult to work with, and requires specific fastening systems due to its density. Maintenance, while less frequent than softer woods, still involves periodic oiling to preserve color and prevent surface checking. Sourcing matters too—look for FSC-certified hardwoods to ensure the material is responsibly harvested. For homeowners who want the absolute best and are willing to invest accordingly, hardwood is hard to beat.


Concrete and Pavers

For ground-level patios and outdoor entertaining areas, concrete and pavers offer durability and design flexibility that wood and composite can’t match. Concrete can be poured, stamped, stained, and finished in countless ways to complement the home’s exterior. Pavers offer a modular, customizable look with the added benefit of being repairable—individual units can be replaced without disturbing the surrounding surface.

Neither concrete nor pavers require the same level of ongoing maintenance as wood decking, though concrete can crack over time and pavers may shift or settle if the base isn’t properly prepared. Both are excellent long-term choices for patios, walkways, and outdoor living spaces when installed correctly.


How to Choose the Right Material for Your Project

There’s no single right answer—the best material depends on your specific project, your climate exposure, your maintenance tolerance, and your budget. A few questions worth working through before you decide:

  • How much direct rain and moisture exposure will the surface see?
  • Are you willing to commit to annual or biannual maintenance?
  • What is the intended lifespan of the project?
  • Does the material need to match or complement existing exterior finishes?
  • What is your total budget, including long-term maintenance costs?

Get It Right From the Start

Material selection is one of the most consequential decisions in any outdoor project—and it’s one worth making carefully. At Washington Construction, we help homeowners think through the full picture before any material is ordered or any work begins. The right choice depends on your specific site conditions, your goals, and how you plan to use the space. We bring that perspective to every project we build—so the finished result not only looks the way you imagined, but holds up the way it should for years to come.